How To Personalize SearchStax Site Search for Sitecore
Any developer working with the SearchStax Site Search solution for Sitecore can now personalize the search experience for different search audiences by using Site Search “Search Profiles.”
- “Personalization” is Sitecore’s method for displaying targeted, relevant content to your contacts based on their characteristics and behavior, such as location, gender, or previous visits. See Personalization at the Sitecore website.
- Search Profiles are the Site Search method of crafting different search experiences from the same data. Within Sitecore, they are known as “Search Models.”
By combining these tools, you can ensure that the right content reaches the right contacts, for example, by showing, hiding, or adjusting content to suit the viewer.
Creating Search Models
If you want to offer different search experiences, the first step is to go to the Site Search platform and create multiple Search Profiles. Each profile has its own search fields, facets, stop words, expansions, sorting options, etc. Site Search lets you test the search experience provided by each profile. A profile has a unique name that can be referenced from Sitecore.
Configuring Sitecore to use Search Models
Now that you have the Site Search profiles in place, it is time to configure your search page to use them. Since you already know what personalization is and how to achieve that, just go ahead and create a few Sitecore profiles and pattern cards:
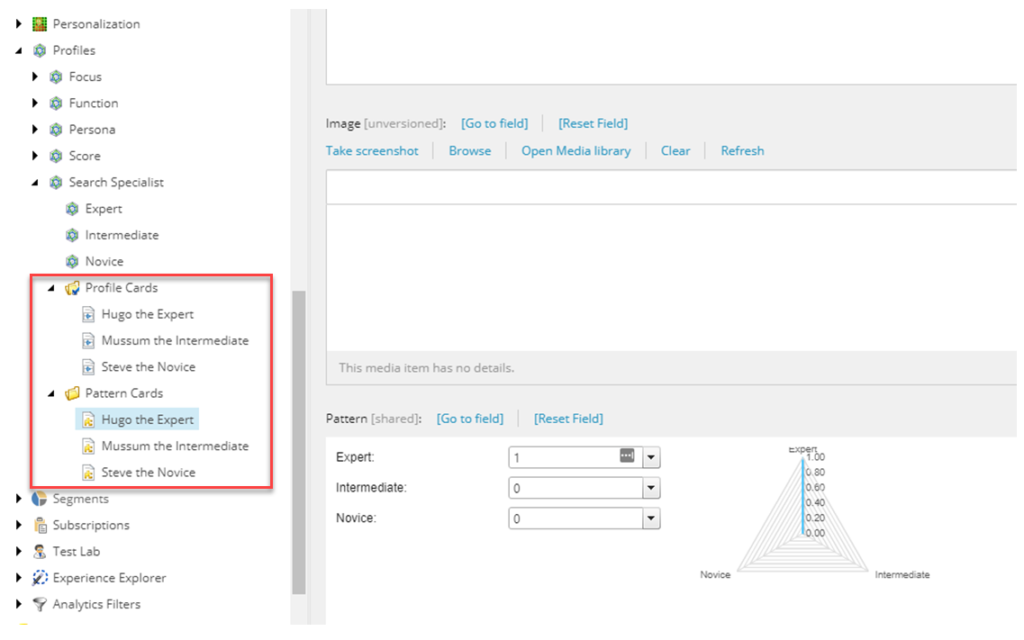
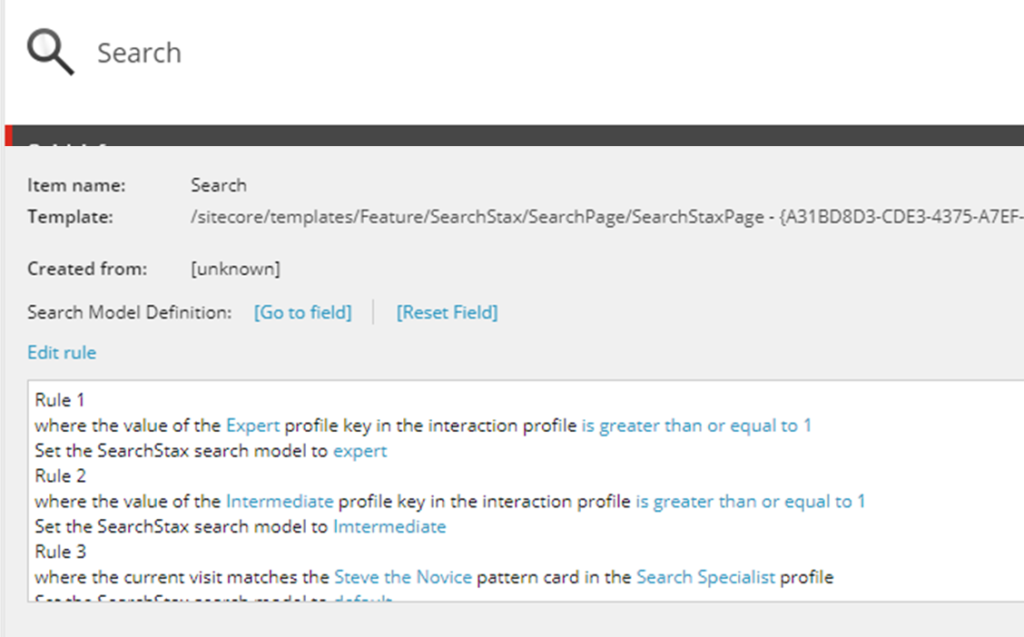
Then open your search page item and find the “Search Model Definition” field:

You need to set the SearchStax search profile to be used on each pattern or when a profile card reaches a given value. Keep in mind that the order is very important here, so make sure you reproduce your precedence. Here are three examples using both strategies (card value and patterns):
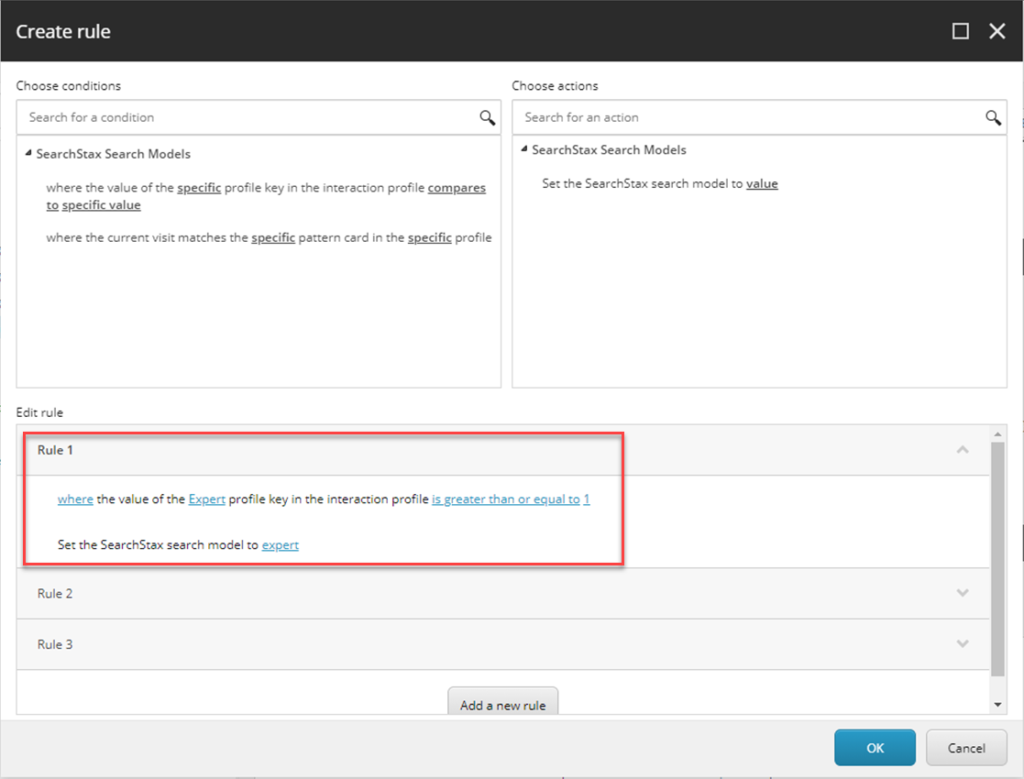
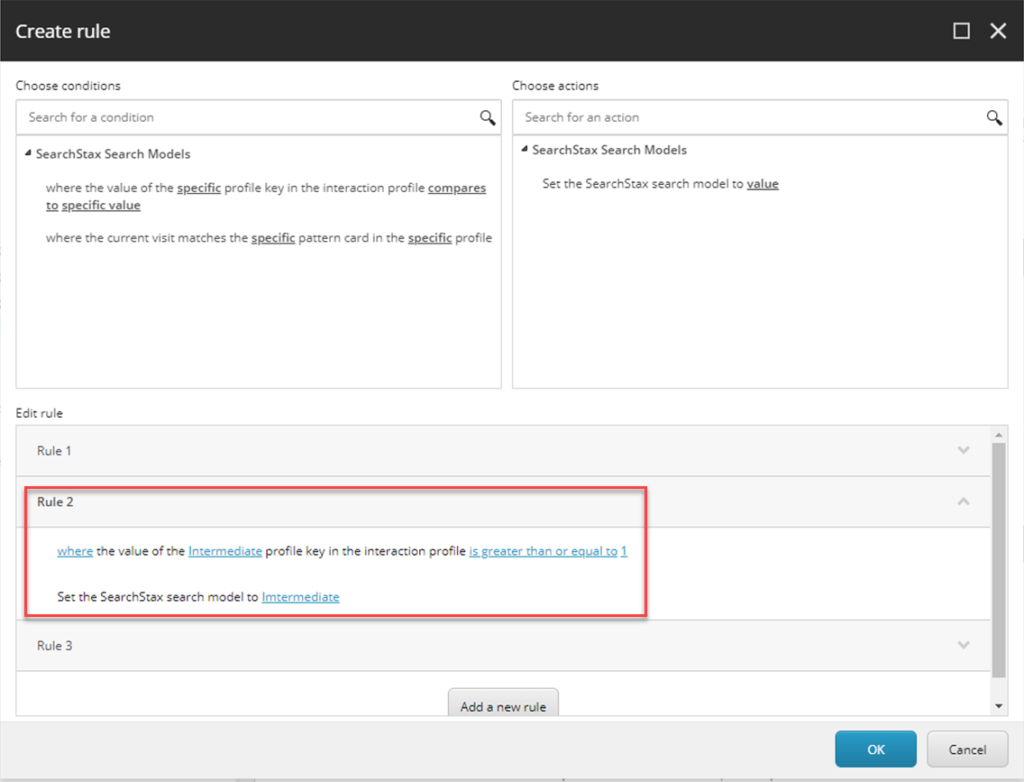
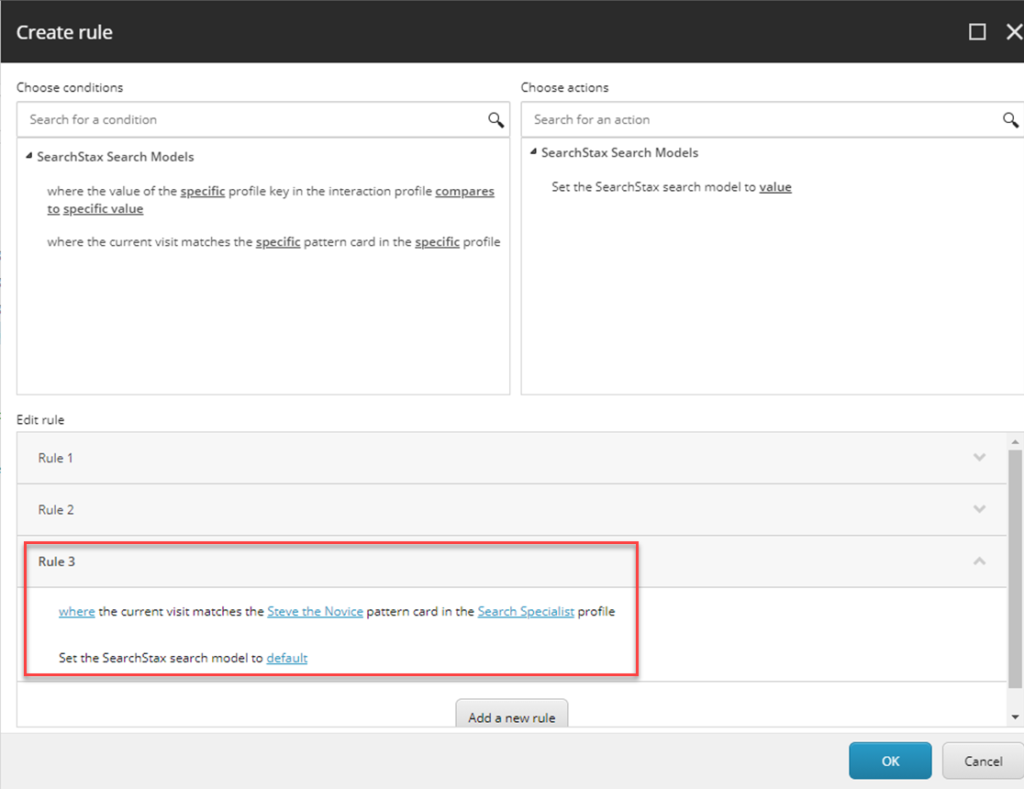
The result is going to be something like this:
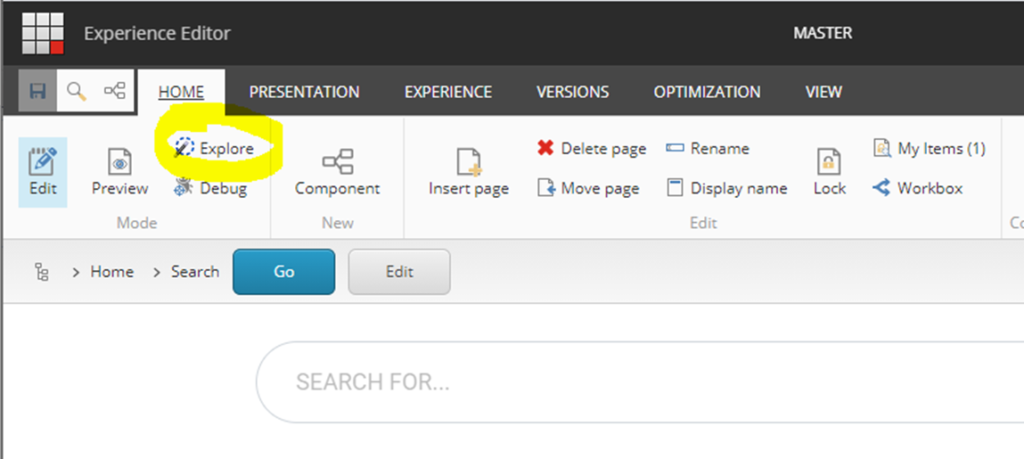
You can use “Sitecore Explorer” view to test it. Open your search page on “Experience Editor” and find the following “Explore” button at the top menu:
Click on it and open the left panel “Onsite Behavior” on the “Profiles” tab:
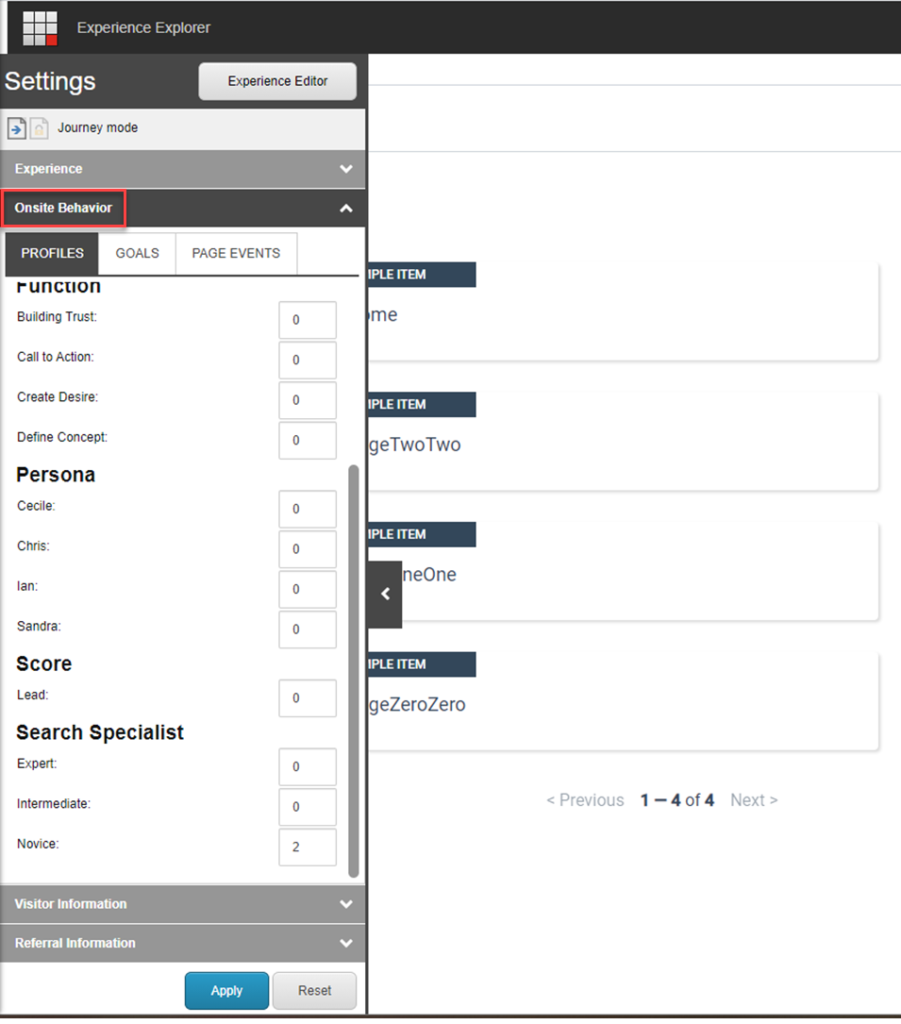
You can use this panel to give profile card points to the current visitor, thus forcing the search page to use a different model following the previously established rules. First, run a query in your search page and open your browser’s developer tool to check the network tab. Find the query request and click on it. You can see that “model” parameter being used is the “Default” one, which is the one defined for “Search Novice”.
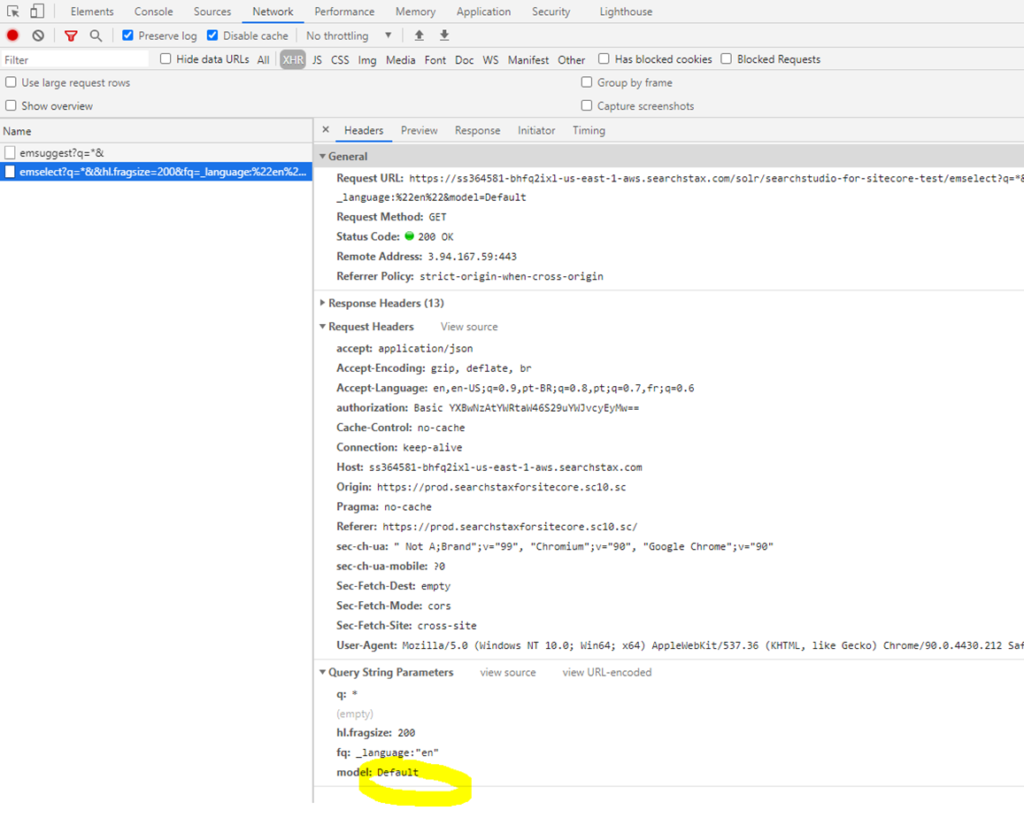
Now, go back to the “Sitecore Explore” view and set some profile card points. Make sure you follow the rules on your search page, and don’t forget about precedence.
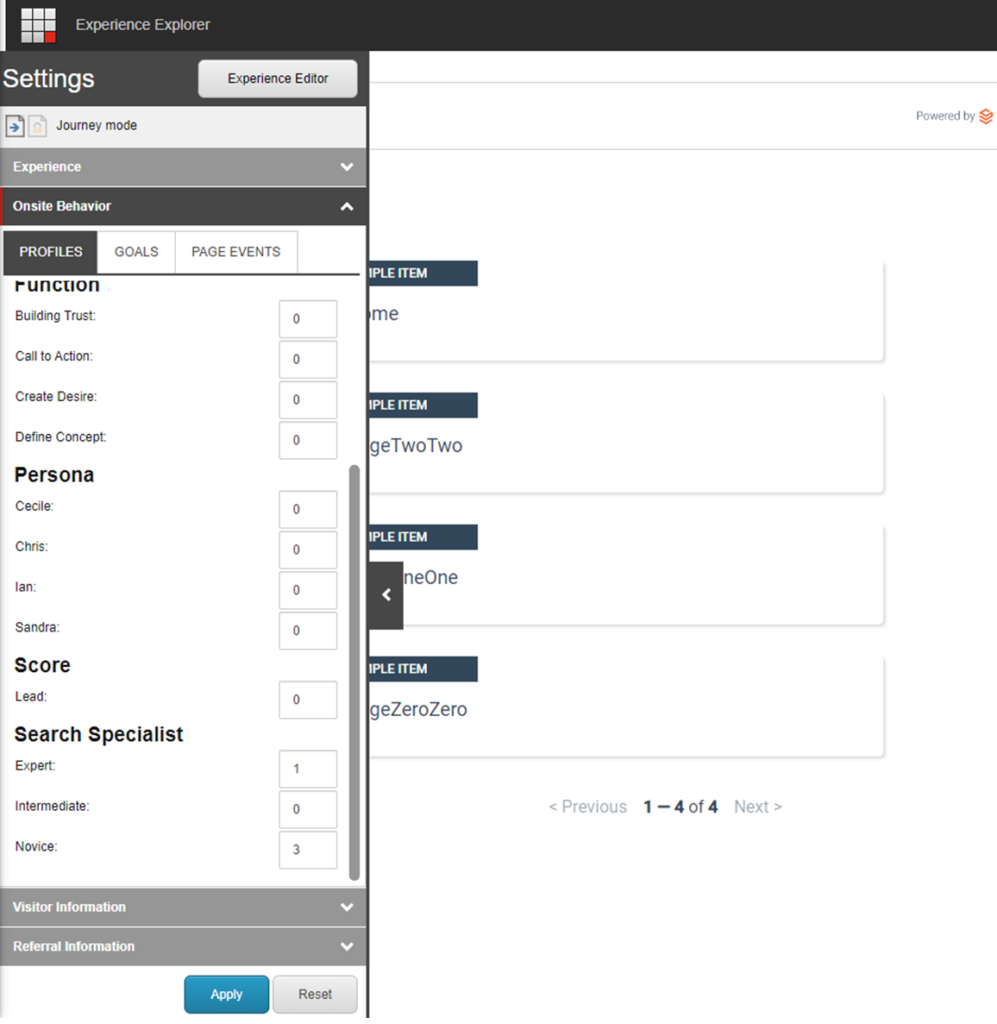
Go ahead and check the network tab again after running a query.
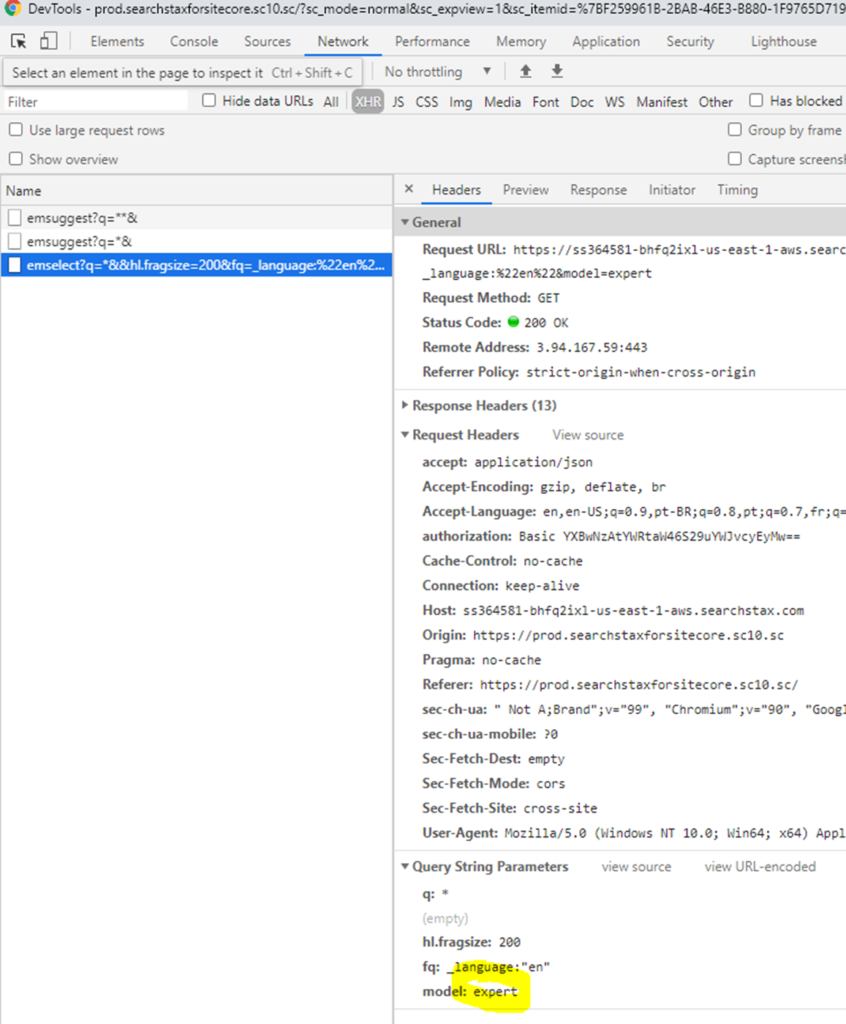
As expected, the search page uses a different search model called “Expert”. This meets what is defined in our rules.
After configuring Sitecore to handle multiple search models, you can play with them to personalize the search experience for each search audience. This ensures that the website offers the best search relevance possible.
Questions?
Do not hesitate to contact the SearchStax Support Desk.

