Managed Search Single Sign-On (SSO) PingFederate
The SearchStax Managed Search service now offers the ability for customers to set up Single Sign-On (SSO) using PingFederate to let their users log into SearchStax apps with a single ID and password that works across multiple software systems.
We use the open standard Security Assertion Markup Language (SAML) to allow identity providers (IdP) to pass authorization credentials to service providers (SP). This page provides instructions on how to configure PingFederate SSO with SearchStax.
SSO is an add-on SearchStax feature that is purchased separately. If you are interested in SSO, please contact Sales or your Account Manager.
The following steps explain how it can be set up for PingFederate.
Instructions
Once SSO is enabled by SearchStax for your account, the owner and/or admin can see options to set it up. The options to set up SSO are in the User Preferences screen of the Managed Search Dashboard:
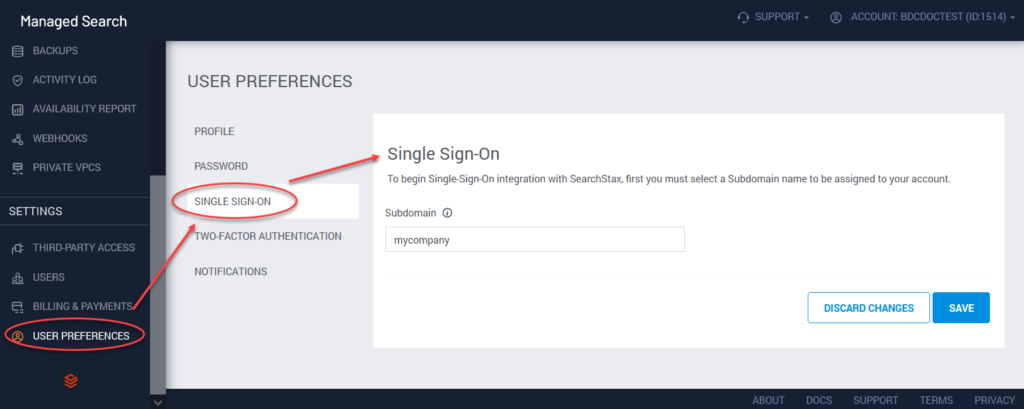
The first option is the Single Sign-On subdomain. This is a label like mycompany, which the system will use to build a URL such as mycompany.searchstax.com.
Click Next to view the next page of SSO parameters.

The “direct Sign-In URL” is the URL that your team can use for signing into Managed Search. The other two URLs are discussed below.
Note: Make sure you have an Adapter already set up inside PingFederate!
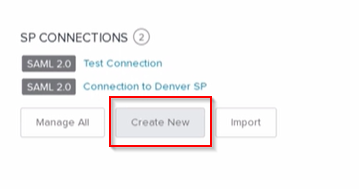
- Go to PingFederate IdP administration console and select the Create New button underneath the SP Connections section:
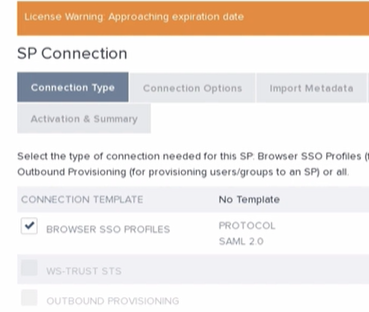
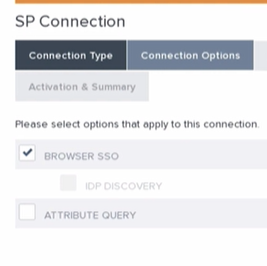
- In the Connection Type tab select the Browser SSO Profiles/SAML 2.0 Template then click Next. In the Connection Options continue with Browser SSO and hit Next again:
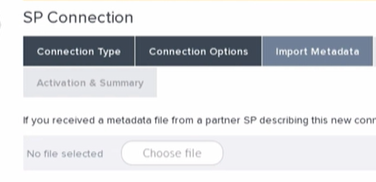
- The next tab is the Import Metadata tab. You can choose to extract our metadata from the URL (shown in a screenshot above the instructions) in our dashboard and import it here, this will prefill some future sections for you:
- In the General Info tab you will need to ensure that the following boxes have the correct information in them whether you imported our metadata or not.
The Entity ID box should contain our EntityID which is also our metadata URL.
Connection Name is whatever you want to use to identify this connection in your PingFed dashboard.
Virtual Server IDS is important because it will overwrite your “master” EntityID and display a value in your metadata that we require to connect properly. This will also need to be in a URL format so something like https://sso-t.com/idp/SSO.saml2 is recommended.
After this scroll to the bottom and click next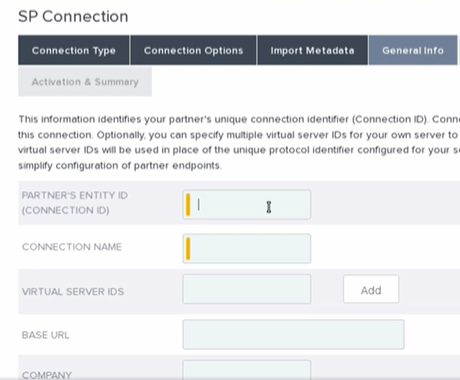
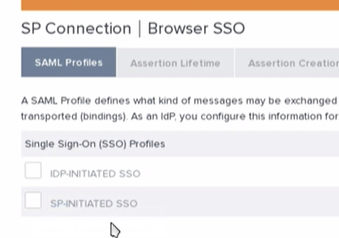
- The next tab is where you will configure the Browser SSO settings. After clicking configure Browser SSO select SP-Initiated SSO and hit Next.
We left the Assertion Lifetime settings as default and then hit next again.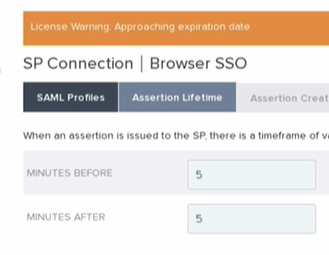
- Next we need to configure the Assertion Creation by clicking the Configure Assertion Creation button. Keep standard identity mapping and hit Next. In the Attribute Contract tab you will need to pass surname, email, and givenName in the assertion via the Extend the Contract sections and then hit Next.
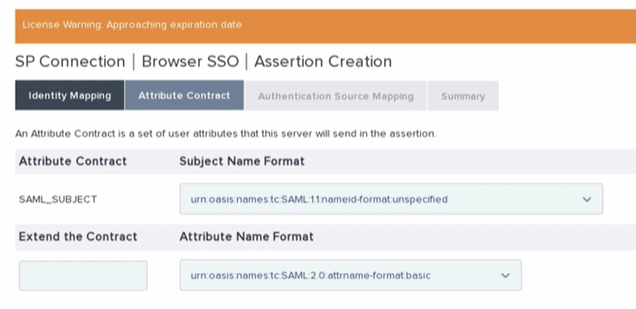
- Now that the attributes are created they need to be mapped. This is done with the Map New Adapter Instance button on the Authentication Source Mapping tab.
Here you will select the Adapter you have configured for this connection and then hit Next until you come to the Attribute Contract Fulfillment tab.
Here you will map your values to the email, surname, and givenName attributes being passed from your end, when finished hit Next and then the Done button until you see the Configure Protocol Settings button.

- When configuring the protocol you will want to send your POST requests to the ACS URL provided in our SearchStax dashboard.
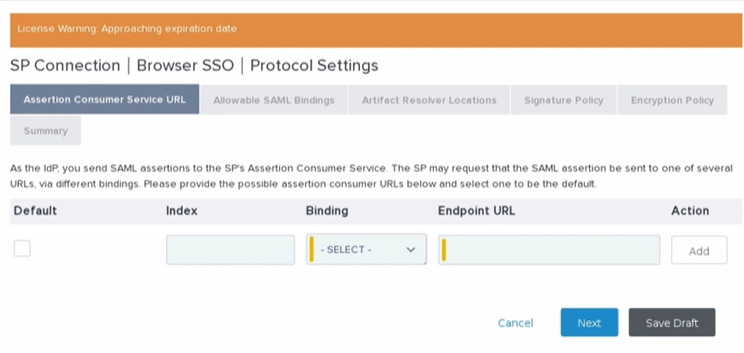
It will look something like this *.searchstax.com/saml2/acs/ then hit Next until you arrive at the Signature Policy Tab.
Here you will select the Always Sign the SAML Assertion box. Now hit Next again until you get to the Configure Credentials button.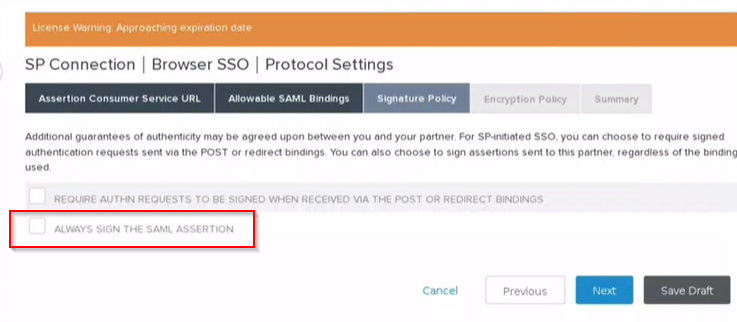
- Here you are selecting the valid certificate used in your signings:
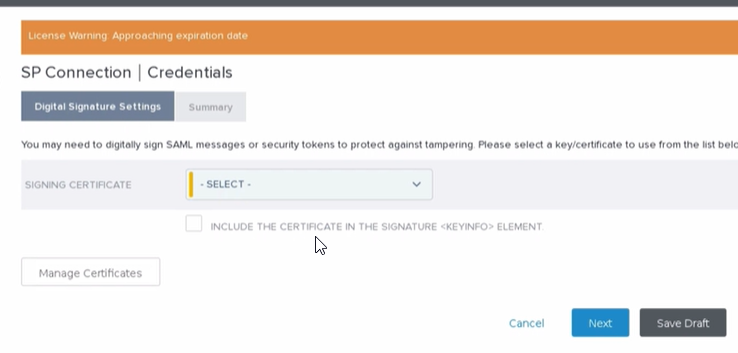
Now hit Next and review all the tabs that are presented. If everything looks good you can activate the connection and then hit Save. - When you are finished settings things up in PingFed you will need to come back to our dashboard and input the values of your SSO:
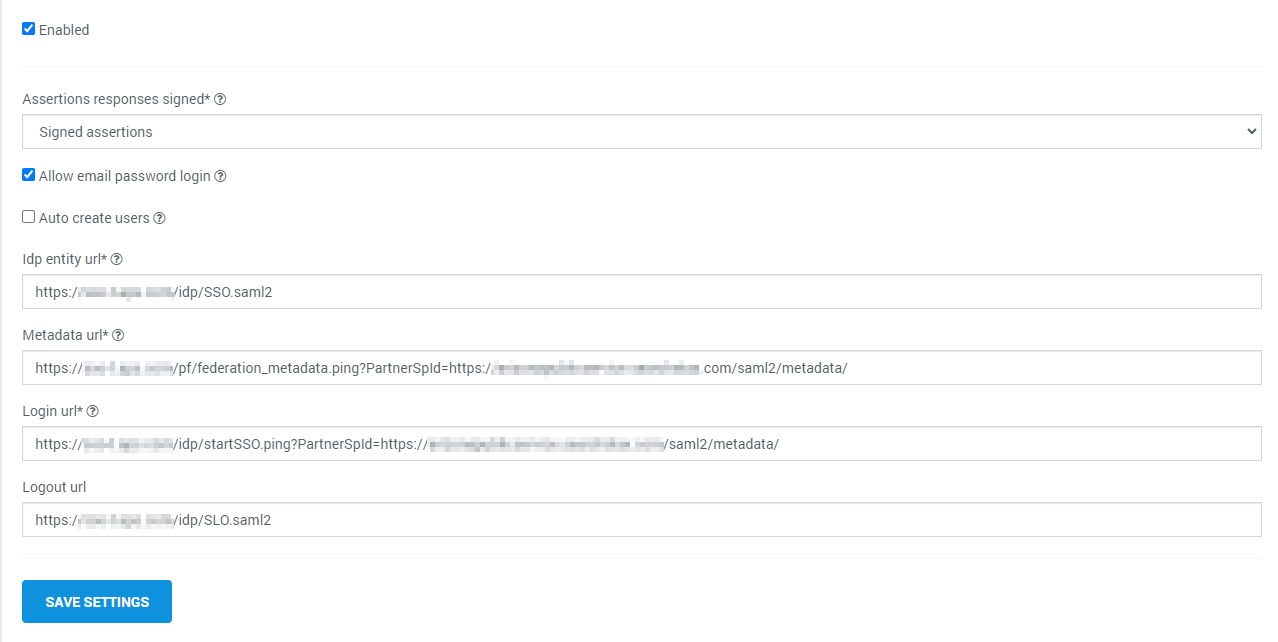
We need your IdP Entity URL, as discussed above this will be your VSID that you configured specifically for this connection.
The URL to your metadata.
Then finally the Login URL used for this connection.
Once the above is added you can select the Enabled box and hit Save Settings.
Login Using SSO
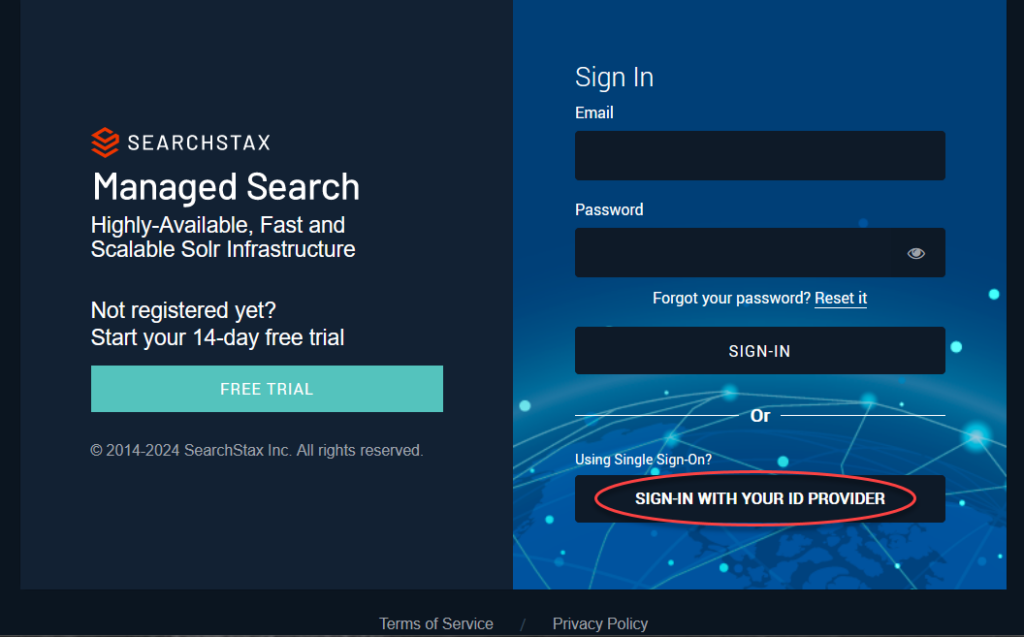
https://app.searchstax.com/ now provides a button at the bottom for SSO – “Sign-In With your ID Provider.” Click this button.
Enter the domain that was set up for the client.
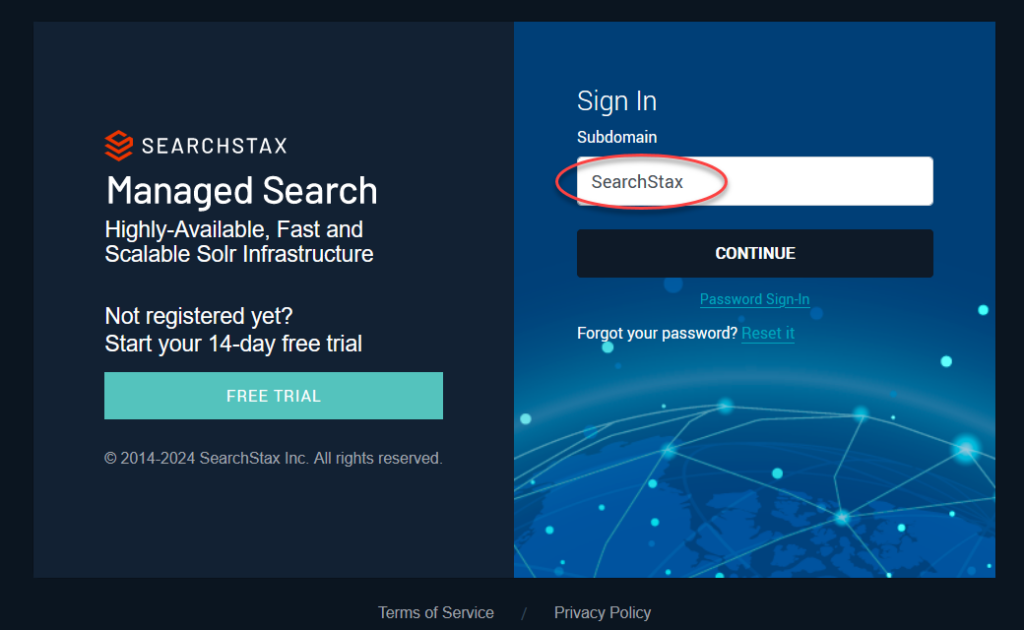
Click Continue. This takes you to PingFederate Sign-in page. After you authenticate, it brings you back to your SearchStax Dashboard.
Alternately, you can directly go to https://<Subdomain>.searchstax.com to login, and clicking on the “Sign-In With your ID Provider” will take you directly to PingFederate.
SSO + Two-factor Authentication
A User can have SSO and Two-Factor authentication both setup. The 2FA settings for a user will apply to all accounts that the user has access to.
However, for the account that has SSO Setup, while logging in, SearchStax 2FA settings will not apply. In that case, 2FA should be set up at the SSO Provider.
Questions?
Do not hesitate to contact the SearchStax Support Desk.

