Crawler Walkthrough
This is an end-to-end walkthrough of indexing the SearchStax product documentation website using the SearchStax Site Search solution and its Crawler. This exercise takes about half an hour to complete.
This is an end-to-end walkthrough of indexing the SearchStax product documentation website using the SearchStax Site Search solution and its Crawler. This exercise takes about half an hour to complete.
The Crawler feature is restricted to Enterprise clients only. The following restrictions apply:
Getting search results for your website is surprisingly easy, but there are moments when you wonder what to do next. This discussion captures those moments.
We assume that you have a Site Search account as an Enterprise client courtesy of your SearchStax Onboarding Manager. Log in to the Site Search interface.
The exercise begins with setting up and running the Crawler. When the crawl is complete, we walk through the Site Search features that create your site’s first search experience.
This page covers the following topics:
When you Create the Site Search App, be certain to configure it as a “Custom” application.
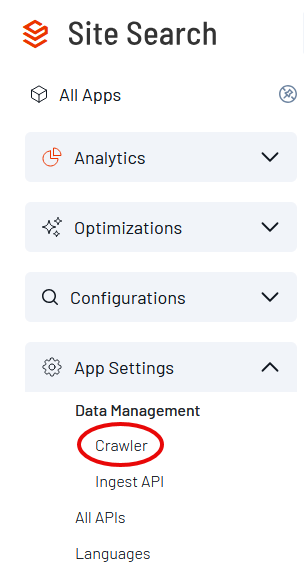
If the crawler feature is enabled for your account, you’ll find it listed under Site Search > App Settings > Data Management > Crawler in the Search App’s navigation menu:
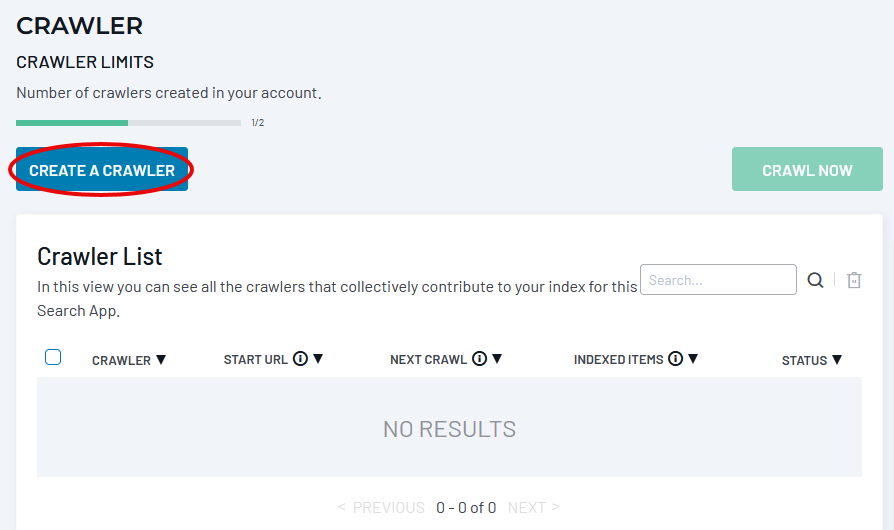
This link opens the Crawler list, which is initially empty.
A Search App can have multiple crawlers, depending on the terms of your contract. Each crawler can index a different website. The list is initially empty. Click Create a Crawler.
The next step is to provide your crawler with a name and a starting URL. Site Search will verify that the URL is reachable.
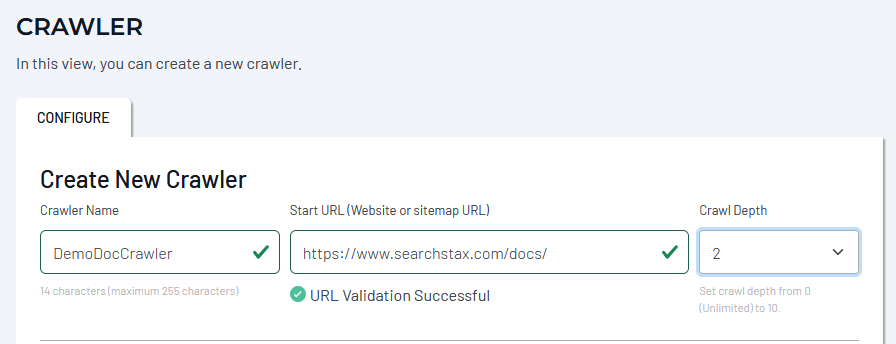
The crawler begins with a root URL and follows page links from there to all connected pages within the same corporate domain, subject to a configurable crawl depth. (The optimum crawl depth for this example is 2, but the default value of 0 works, too.)
You can Crawl Now if you wish, but we advise you to visit the list of crawler fields first. The crawler is limited to one run per day, and we need to set up a special field before launching it.
This is an optional step to demonstrate setting up a facet. The crawler imports a set of default fields from webpages (see Default Field Map for details). You will find, however, that your target website uses additional fields. Site Search lets you add these fields to the crawl.
The SearchStax website doc pages contain a Products meta tag that makes a simple facet demonstration:
<meta name="Products" content="Managed Search">We’d like the crawler to import the value of this tag to the index.
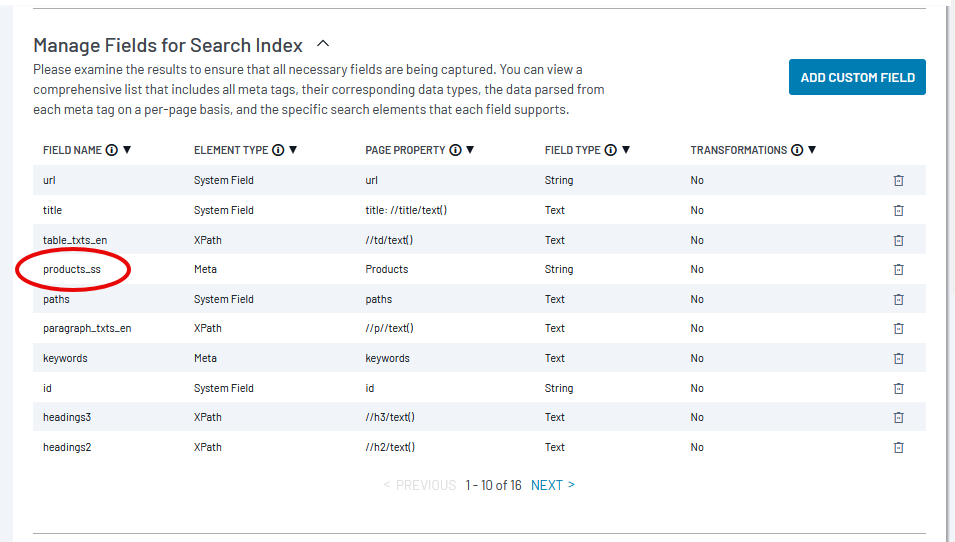
Open the Manage Fields for Search Index section of the crawler settings. You’ll see the list of default fields.
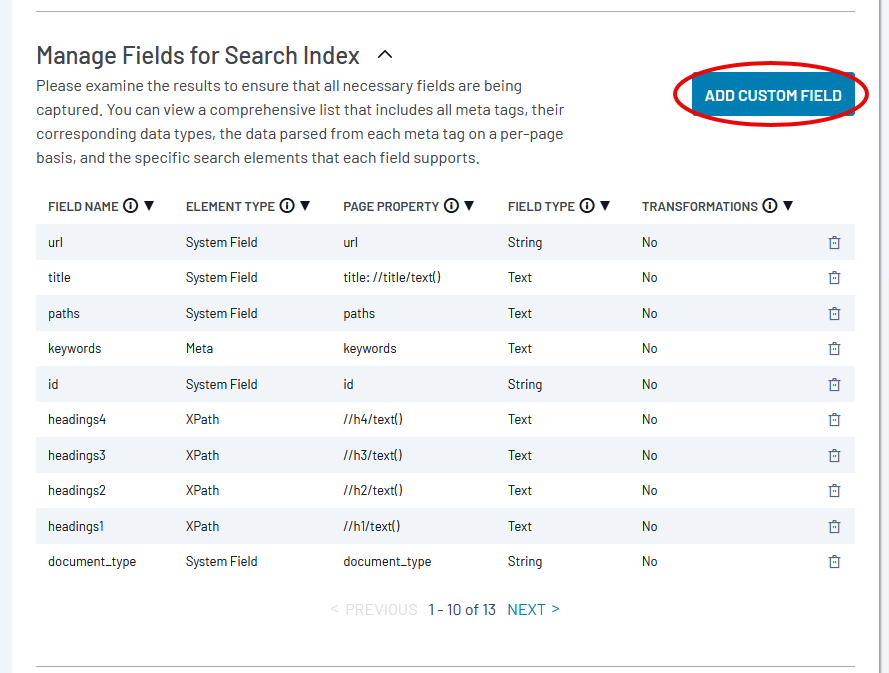
These fields could be useful in your project, and are harmless if not. Click the Add Custom Field button. The resulting dialog box is described on the Crawler page.
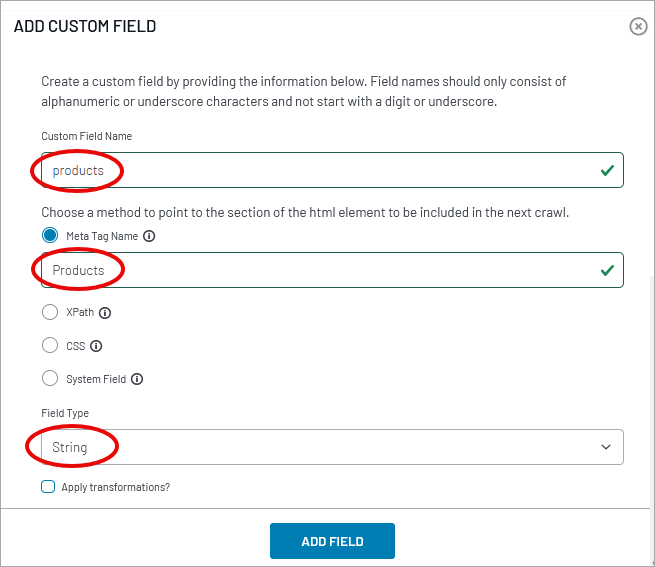
Click Add Field. The new field, labeled products_ss (your field name plus the string datatype), will appear in the list.
When you are satisfied with the setup, scroll to the bottom of the screen and click the Save Changes button.

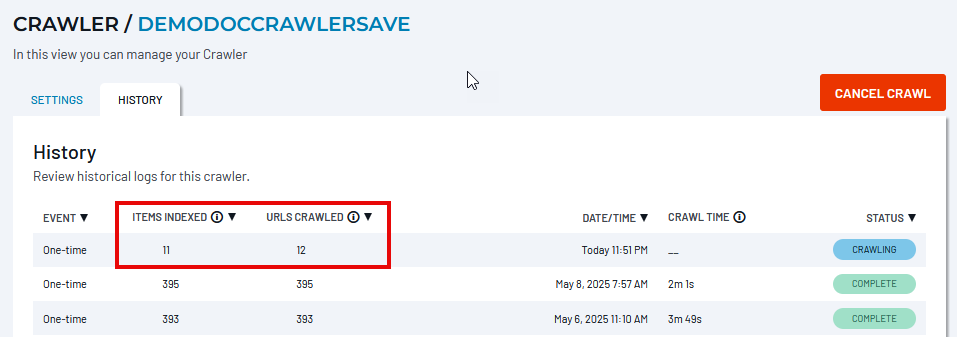
To launch a crawl, return to the Crawler List. Select the checkbox beside the crawler name and click the Crawl Now button.

As the crawl proceeds, you’ll see progress statistics updating on the History tab.
This optional section presents some “tips and tricks” for inspecting the crawler’s output before configuring the Search Fields and Result Fields in Site Search. Although technical, the steps described here produce a convenient map of the indexed fields and their typical values.
Due to search-engine configuration settings, it may take as much as five minutes for the crawl data to be committed to the index. Until this time elapses, Site Search displays and query results will look the same as they did before the crawl.
Navigate to the Site Search > APP Settings > All APIs > Search & Indexing screen. The Read-Only authentication token is near the bottom of the screen.
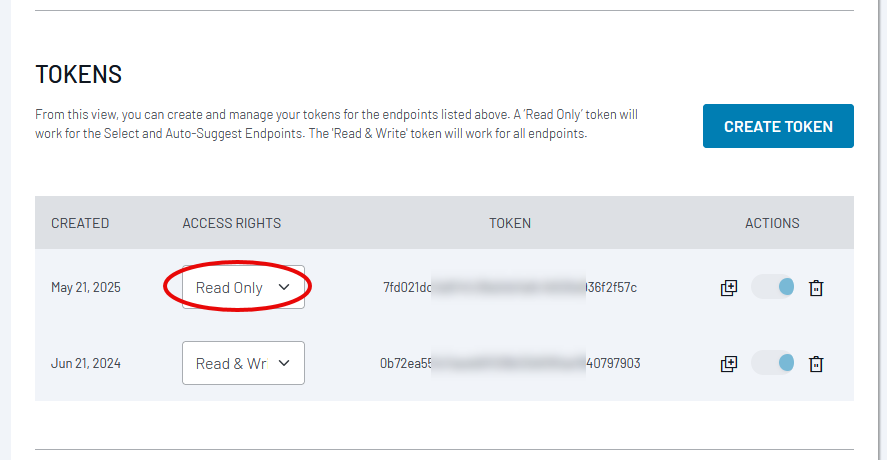
You’ll need to copy the token to the clipboard and paste it into a text buffer temporarily.
Now, scroll back up the screen and find the App’s Select Endpoint.
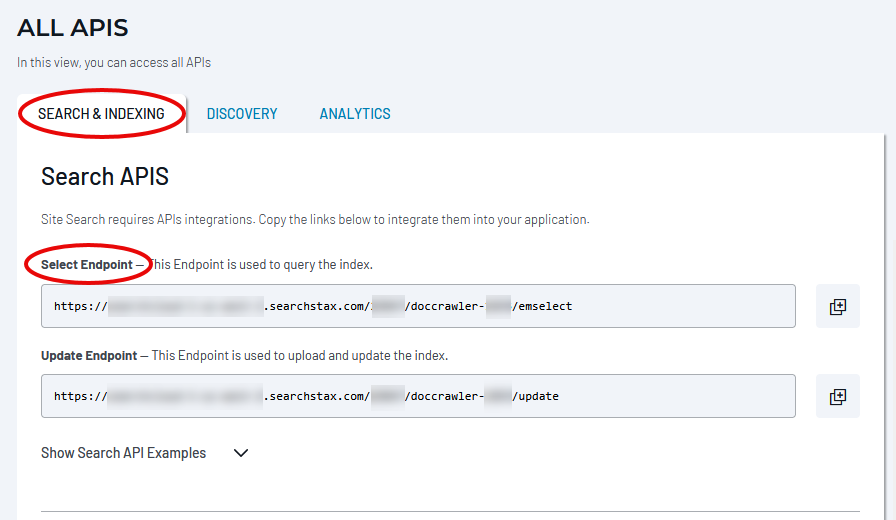
Copy the endpoint to a text buffer and make these changes to it:
Now we’ll assemble a Curl command in the text buffer. Use this format:
curl -H "Authorization: Token <Read-Only Token>" "<Select Endpoint>/select?q=*:*&wt=json&indent=true"
Paste this string into a Linux Bash command window (or a PowerShell terminal on Windows) and send it. It will return ten documents from your index, showing all the fields in use and their content. (Notice the products_ss custom field near the bottom of this list.)
      {
        "id":"https://www.searchstax.com/docs/searchstudio/analytics-glossary/",
        "exif_tenant_id":"2",
        "exif_crawlid":"2151",
        "exif_crawl_definition_id":"43",
        "exif_appid":"studio-1810",
        "url":["https://www.searchstax.com/docs/searchstudio/analytics-glossary/"],
        "paths":["docs / searchstudio / analytics-glossary"],
        "document_type":["html"],
        "date":"2024-06-24T02:36:12Z",
        "title":["Analytics Glossary - SearchStax Site Search Docs"],
        "headings1":["Analytics Glossary"],
        "headings2":["Questions?"],
        "description":["The SearchStax Site Search solution's Analytics Glossary is a summary of key terms and definitions used for analytics in Site Search."],
        "products_ss":["Site Search"],
        "content":["Analytics Glossary - SearchStax Site Search Docs Managed Search Site Search Help

             <Most of the content was removed for clarity>

        ],
        "_version_":1802708265532915712}
If you have difficulty making this work, contact SearchStax Support for assistance.
This output will be a convenient resource in the following steps.
At this point, the webpage data is in the index, but we can’t search it yet. Before we can search, we have to choose which fields to search.
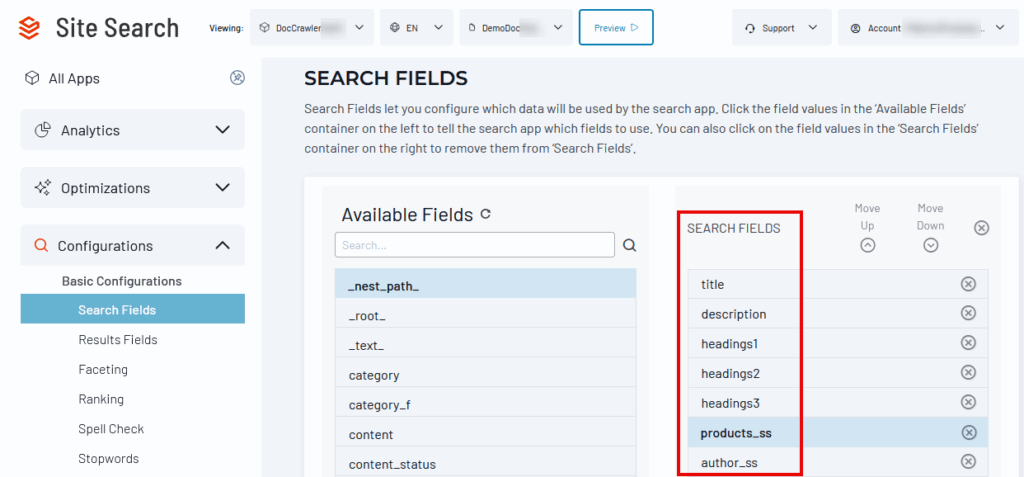
Navigate to Site Search > Configurations > Basic Configurations > Search Fields. This screen tells Solr which index fields to search.
After a crawler run, and in addition to waiting five minutes for the index to commit, you should click the Reload Schema button to update the list of potential search fields.
The left column contains the available fields in the schema (but they are not necessarily present in the crawled documents). Click on a field to move it into the list of searchable fields.
The title and description fields are pre-selected as a convenience to the user. Select the headings1, headings2, and headings3 fields, too. Headings are rich in relevant keywords. (The content field is pre-selected, but in this case, we suggest removing it from the search list.)
To experiment with a facet list, also add the product_ss field to this list. Facets must be based on search fields.
Then click Publish to re-issue the index. Publishing a small project like this one takes a couple of minutes.
In this exercise, we’ll use the Site Search Hosted Search Experience to view and test our search settings. This feature is a fully functional search page supporting the many features controlled by Site Search. The Hosted Search Experience lets us configure a feature, publish it, and view the result a few seconds later.
You can do almost the same thing using the Site Search Preview screen, but that environment is tailored to engineers rather than website designers.
The Search Fields (above) are not always the best to display as Results Fields. We must show Site Search how to present results in the Hosted Search Experience.
Navigate to Site Search > Configurations > Basic Configurations > Results Fields.
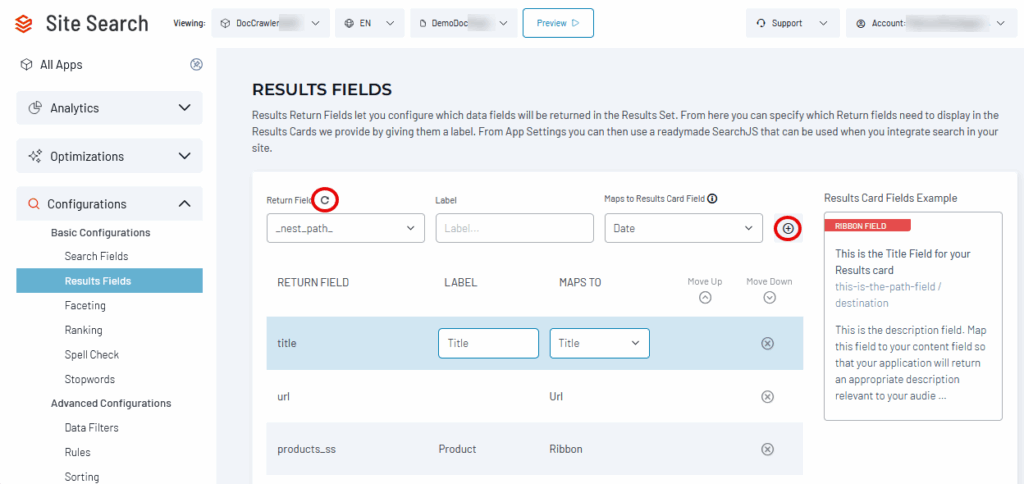
The Results Fields screen lets us select fields from the index to display in the Hosted Search Experience’s search results. Each field can be mapped to a preformatted position in a results “card.”
After a crawler run, and after waiting five minutes for the index to commit, you should click the Reload Schema button to update the list of potential display fields.
Choose a field from the Return Field list. If needed, add a human-friendly Label. Then, map the field value to a Results Card Field, as explained on the Results Configuration page. The (+) icon at the right adds the configured field to the list of display fields (the lower red box). Don’t overlook that step!
For this exercise, make the following mappings:
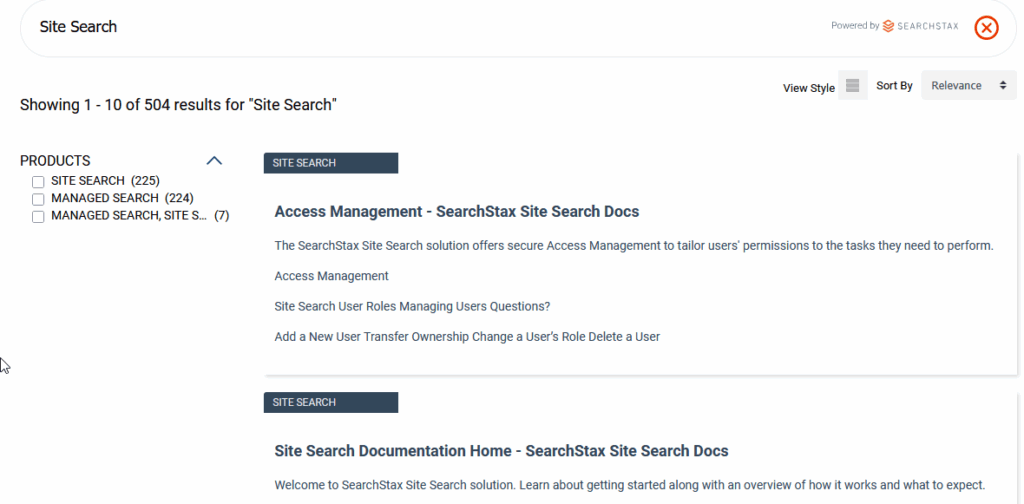
At this point, a typical result item in the Hosted Search Experience looks much like this:
The search page seems incomplete without at least one facet list off to the side. How do we set that up?
Navigate to Site Search > Configurations > Basic Configurations > Faceting.
The Faceting page provides full instructions for operating this screen. To begin, check the box that enables faceting.
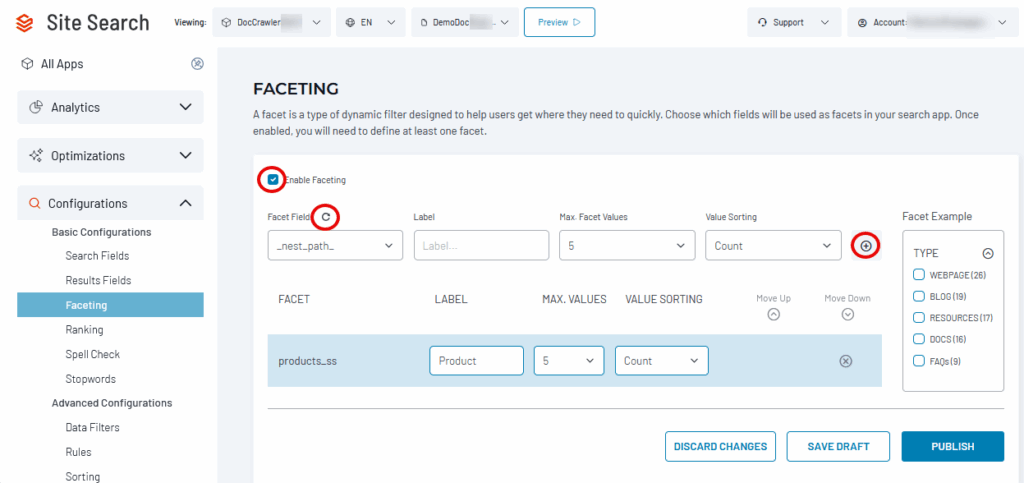
The Facet Fields list lets you select an index field for a facet. (If you don’t see the field in the list, click that Reload Schema button again.) Select products_ss. You can add a label to be the title of the facet list. In our example, the facet options will be ranked by count.
Click the (+) icon to add the facet to the Profile.
When finished, click the Publish button.
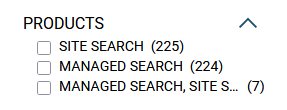
If you check the Hosted Search Experience at this point, you’ll find a new facet on display.
Experience has taught us that a search project often has many more stakeholders than developers. The project will need a public search portal for stakeholders so they can contribute their insights and requirements without logging into Site Search.
In the navigation menu, navigate to Site Search > Configurations > Search UI > Hosted Search Experience.
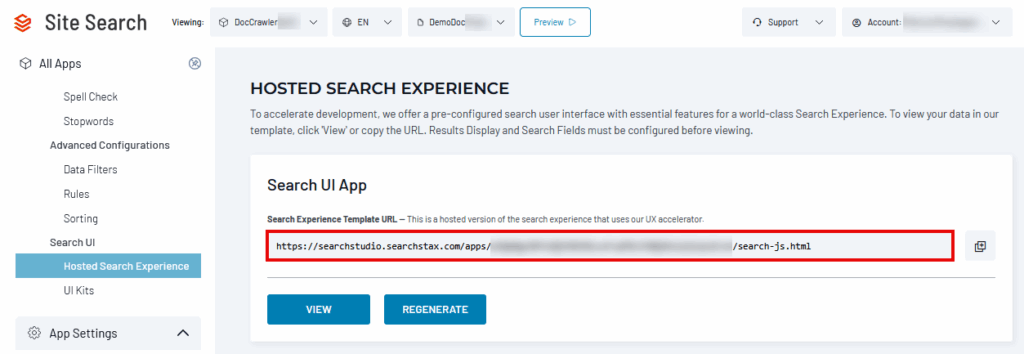
This screen provides a URL to a shareable search environment. You can View the page immediately or use the Copy icon on the right to share the URL with coworkers.
Use the Regenerate button to refresh the Hosted Search Experience after making changes.
You can use this guide to perform an initial crawl of your own website. Watch for these issues:
Do not hesitate to contact the SearchStax Support Desk.